Friday, November 15, 2019

52 Weeks of Art: Week 20

Week 20: Alcohol Ink


Welcome to week 20 of 52 weeks of art! What are we doing this week?


         Well, it finally happened. I found a medium that I did not like at all. I didn't like anything about this whole process. This week we had alcohol ink. This isn't just something I had laying around the house. I did some research, off to Google! I looked in to buying some inks, but I wasn't about to spend $4 on individual colors. A cheap set of 9 colors was $35. This was something I didn't want to invest a lot of money in because I wasn't even sure I would like using it. Good thing I didn't! I do not like it! So, off to Google again to discover a way to make my own alcohol inks!

     Because Google is amazing, I was able to find out how to make my own. Super simple. Markers + rubbing alcohol. I have a large collection of sharpies, and sharpies were the number one recommended marker for this, so I used sharpies. Now, I read that the more alcohol the less vibrant the color. So, here's what I did:


Sharpie in a small container with a tiny amount of  alcohol.

A rainbow of sharpie colors.
     After hours of the sharpies sitting in the alcohol like this, I decided that wasn't going to work. I pulled them apart and pulled the tip out to soak in the alcohol. After two days of soaking in alcohol this is what I ended up with. Not very concentrated. I was very disappointed.

Here's the sharpie tips soaking in alcohol.

     Here is my attempt at using my homemade alcohol inks. The colors are so very pale. I was actually worried they wouldn't show up in the photos. They did, but just barely. I used photo paper, because alcohol inks work best on no porous surfaces - glass, ceramic, photo paper, etc.

Here's my attempt with homemade inks.
      Since the homemade inks weren't working so well, I colored on the photo paper with the sharpies and dropped some ink onto. That sort of worked. The only problem with coloring on the paper was the fact you could see the lines from coloring.


Using sharpie ON the paper THEN adding the alcohol.

     Then I decided to try coloring with the sharpie so it didn't really LOOK like I colored it. If that even makes sense. I dropped the alcohol on it again. Then I used my finger to try and spread it around. Those colored spots were NOT going anywhere.


     Here's some examples of what REAL alcohol ink looks like:

Found this here.


Found this here.


On to rating alcohol ink...

     Just a reminder on the criteria for rating each medium.

Ease of use: How easy was this medium to use.

Affordability: How affordable supplies are for each medium.

Accessibility: How easily accessible supplies are for each medium. Example, are specific tools required that are hard to find?

Fun to Use: How much enjoyment I got out of using this medium

     So, for alcohol ink, my rating is: 11

Ease of use: 4
  Honestly, I think if the colors were better, this would have been incredibly easy to use. Basically, you drop some ink onto a surface with a small dropper. Done. Super easy.

Affordability: 3
     Alcohol inks are not cheap. You can go the DIY route and save yourself some money if this is something you want to try. However, I can't say the DIY route turned out all that great. I'm sure I must have been doing something wrong, because SO many people out there make their own ink.

Accessibility: 3
     I'm going to say that the supplies are only mostly accessible. If you buy the alcohol inks you'll have to get them from an art store or online. Not every arts and crafts store is going to carry them. However, sharpies and rubbing alcohol are available at your local grocery store.

Fun to Use: 1
    Nope. This was not fun. This was frustrating to me. I think I might have enjoyed it more if the inks had worked out better. Even if they were better, I don't think I would have liked this medium.


     If you would like to go on this epic art adventure with me, next week we will be doing...


     If you choose to follow along, please post your work using #52weekartadventure!

Friday, November 8, 2019

52 Weeks of Art: Week 19

Week 19: Pen


Welcome to week 19 of 52 weeks of art! What are we doing this week?


         It's another week of art! This time we're using pen. Pen is one of my favorite mediums to use. While I love using color, there's something very beautiful about just using black and white. Using just one color requires you to get creative when it comes to shading. With other mediums (pencil, charcoal, etc.) you can smudge your work, blend it. With pen, you can't do that. There are various techniques for shading you can use. Here's some examples (sorry for the blurry photo):


     You can see that by making your lines closer together you have a darker value. The more space between your lines creates a lighter value. You can use these techniques to add dimension to your drawings. 

     You can get some drawing pens from any art supply store - or Amazon. But you don't have to have the fancy drawing pens. You can use just a regular ball point pen. I have a large selection of various brands of pens. I don't have any particular favorites, I think they all work well.

     I just finished up Inktober, so I've done a lot of pen drawings recently. Here's some samples of some I've done in the past:


     For this weeks collaboration I decided to do a drawing of a magnolia. The husband and I went to Georgia, Tennessee, and Florida not too long ago. There were all these beautiful magnolia trees everywhere. I took some pictures, but the pictures aren't as beautiful as the real thing. Here's my drawing from one of those pictures. 


On to rating pen...

     Just a reminder on the criteria for rating each medium.

Ease of use: How easy was this medium to use.

Affordability: How affordable supplies are for each medium.

Accessibility: How easily accessible supplies are for each medium. Example, are specific tools required that are hard to find?

Fun to Use: How much enjoyment I got out of using this medium

     So, for pen, my rating is: 20

Ease of use: 5
  Pens are very easy to use. As easy as using a pencil. The only down side to using pens - you can't erase it. 

Affordability: 5
     You can get a set of drawing pens for about $10 on Amazon. Pens are cheap.

Accessibility: 5
     You can get some drawing pens just about anywhere. Any arts and crafts store will have them. They are also available online. I love online shopping.

Fun to Use: 5
    Like I said earlier, pen is one of my favorite mediums to use. So yeah, I had fun doing this weeks art adventure!


     If you would like to go on this epic art adventure with me, next week we will be doing...


     If you choose to follow along, please post your work using #52weekartadventure!

Friday, November 1, 2019

52 Weeks of Art: Week 18

Week 18: Plaster


Welcome to week 18 of 52 weeks of art! What are we doing this week?


         This week was another medium I have never used before. It was an interesting one - plaster. We didn't use plaster to make any sculptures or anything. We used it to make sculptural paintings. I know, that sounds like making a sculpture. It's not, it's a little bit different than that.
   
    It's called sculptural painting. Basically, you take some colored plaster and make a 3D painting with it. Sounds easy enough, right?

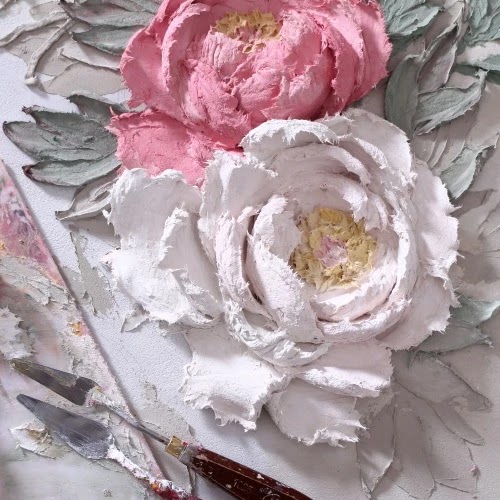
     Here's some amazing examples of some sculptural paintings:


Some beautiful plaster flowers by Laurel Pulvers


Some more beautiful flowers by Laurel Pulvers

     Alright, it doesn't actually look easy to do at all. I can't even tell you how many videos I watched on how to make these beautiful plaster flowers. But, in the end, I was afraid to even try to make a flower. I just went with some abstract art.

     We mixed up a small amount of plaster. The box said it dries in about 7-10 minutes. So, again, there is a lack of photos on the whole process. I was worried the whole time it would dry out before I was able to do anything with it. Sorry. So yeah, mixed up a little bit of plaster, added some acrylic paint to it to color it, and got to work. 

     Turns out I didn't need to worry about it drying out. It actually took quite a while for it to dry out. Now, when I say dry out, I mean too dry to work with. It still took HOURS for it to dry all the way. After mixing in the paint, I just used a palette knife to apply the plaster. I used a piece of masonite, I was worried that anything else wouldn't have been sturdy enough to hold the plaster. 

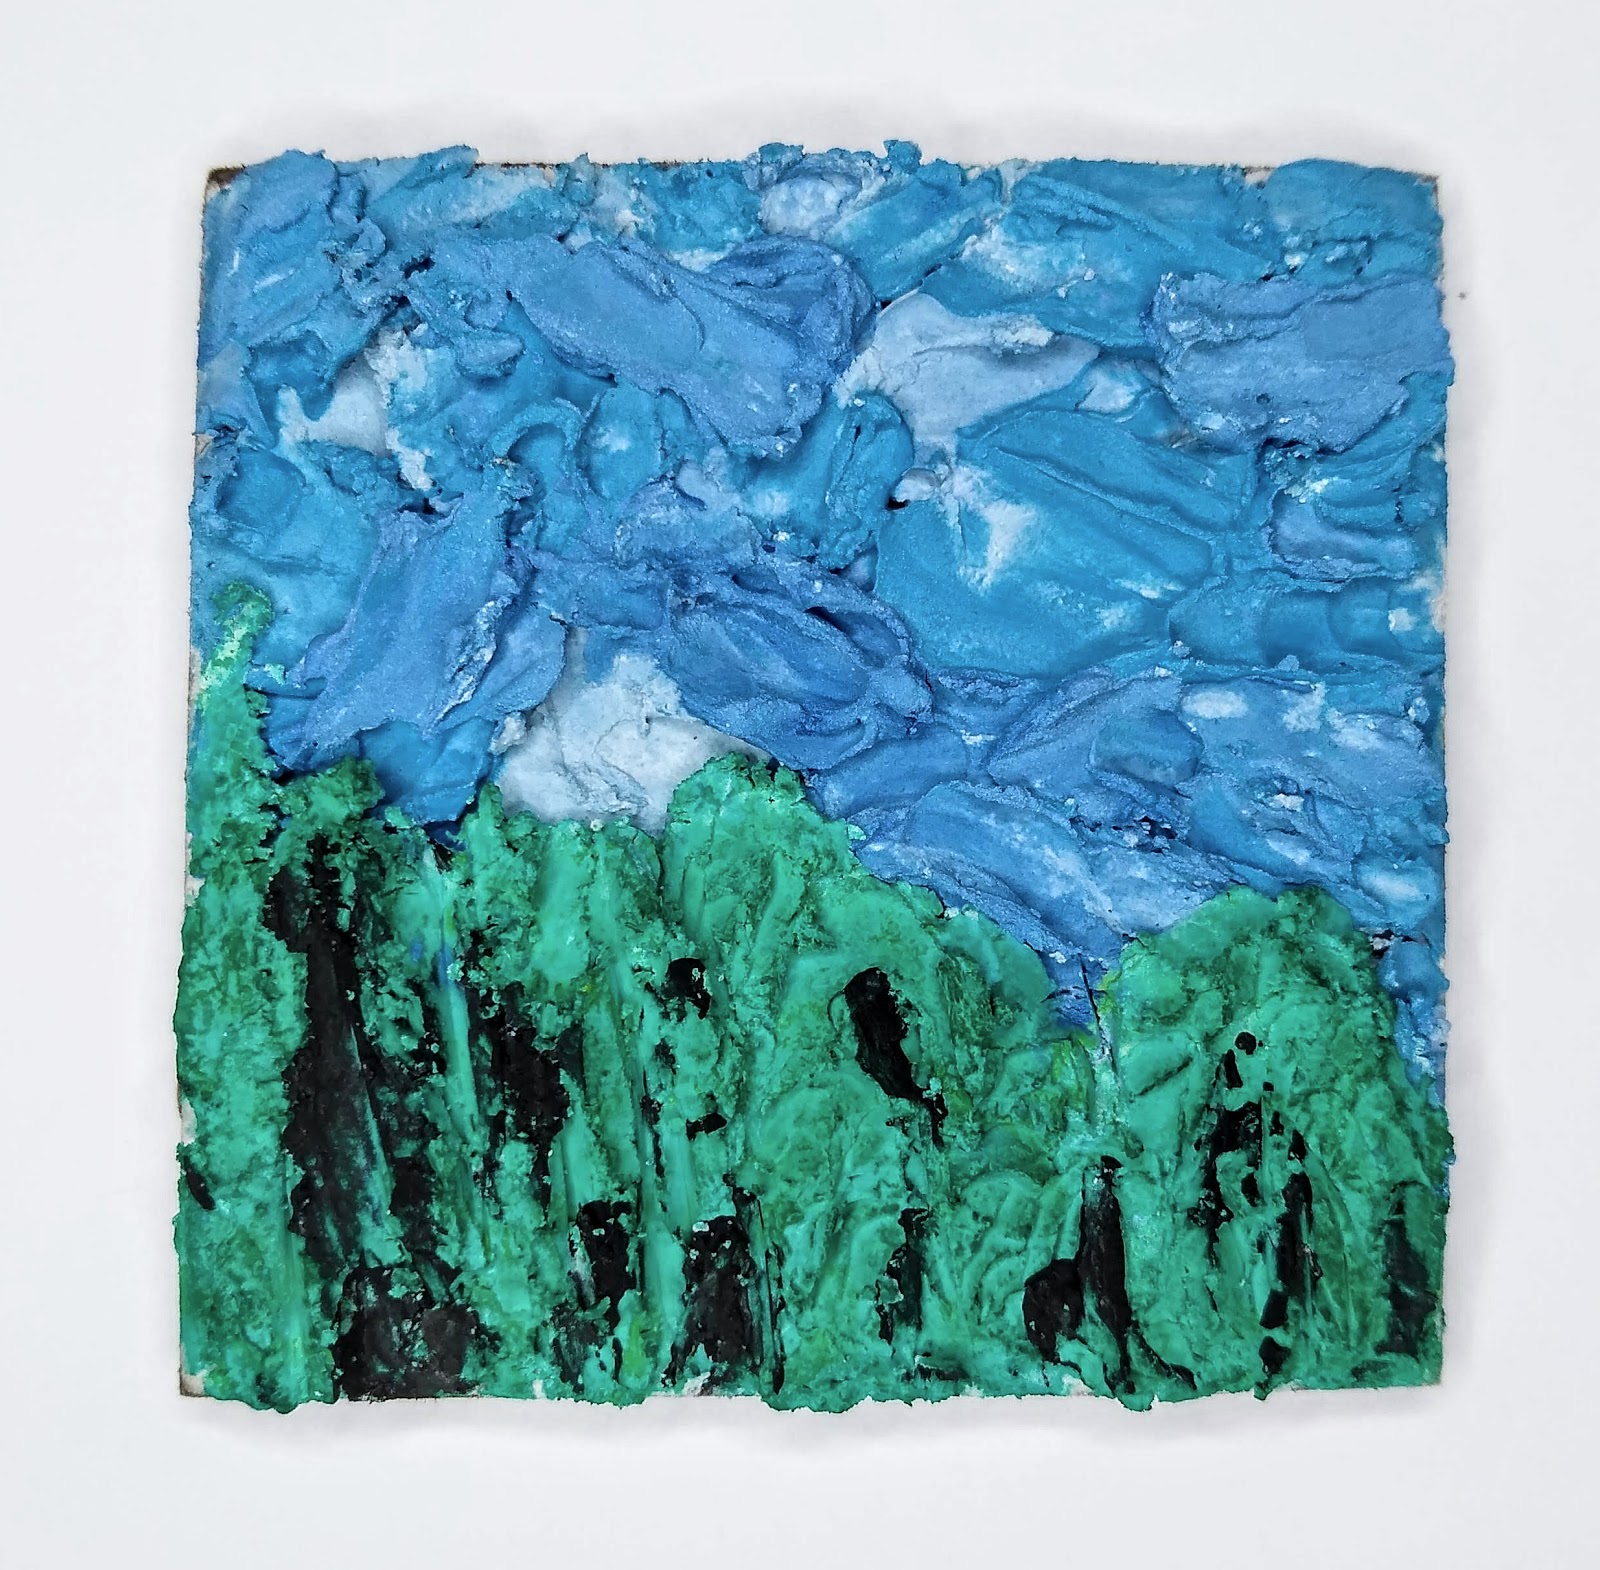
      Here is what I created....


     I was going for a little landscape. Some sky, trees, you know.... Rebecca thought it was the ocean. The Little One thought it was some grass. I guess those could all be right. What does it look like to you?


On to rating plaster...

     Just a reminder on the criteria for rating each medium.

Ease of use: How easy was this medium to use.

Affordability: How affordable supplies are for each medium.

Accessibility: How easily accessible supplies are for each medium. Example, are specific tools required that are hard to find?

Fun to Use: How much enjoyment I got out of using this medium

     So, for plaster, my rating is: 18

Ease of use: 4
  This was actually much easier to use than I thought it would be. However, I didn't try to make anything too complicated. I think if I tried anything more sculptural it would have been difficult. If you're just going to plop some plaster down in an abstract style, this was a piece of cake.

Affordability: 4
     You can get a box of about 4 lbs of plaster for about $10. We only used a tiny amount of it, so you could probably make several sculptural paintings with 4 lbs of plaster. I just used a tiny glob of acrylic paint to add color to the plaster. So yeah, it's pretty affordable.

Accessibility: 5
     Plaster is pretty easy to come by. So is acrylic paint. Palette knives are also pretty easy to get. But you could use plastic knives, popsicle sticks, anything.

Fun to Use: 5
    I really enjoyed making a sculptural painting. It was fun. I think this is something everyone should try at least once in their lives. Seriously. Go for it.


     If you would like to go on this epic art adventure with me, next week we will be doing...


     If you choose to follow along, please post your work using #52weekartadventure!

Friday, October 25, 2019

52 Weeks of Art: Week 17

Week 17: Pencil


Welcome to week 17 of 52 weeks of art! What are we doing this week?


     Well, here we are, week 17. Our medium this week is pencil. That's right. Just your basic #2 pencil. I didn't even use a mechanical pencil, just your standard wooden, yellow Ticonderoga pencil.

     I have to be honest, I did NOT want to use pencil. I'm not a fan of pencil drawing. I do use a pencil pretty much every day. I use pencils to sketch things out before I use a different medium. I use pencils to write stuff down, make lists. Pencils are a part of my every day life. I think I take them for granted. They're always there for me. I use them, and then I end up erasing their work when I'm done.

      So, this week I had to actually draw - and finish - a whole picture using just my trusty pencil. Ugh. Before we get into that, let's just take a look at what some other artists are able to create using just a pencil.


Found this here.
Found this guy here.

     That's pretty amazing stuff, right? That's a pretty high standard to meet with just my pencil. But, here we go. Pencil artwork. I didn't need to test out any papers, I have used pencils on every type of paper I own at this point. So, I went with your standard drawing paper for this.

And, here we go - pencil drawing! (It's some blueberries, in case you can't tell.)


On to rating pencil...

     Just a reminder on the criteria for rating each medium.

Ease of use: How easy was this medium to use.

Affordability: How affordable supplies are for each medium.

Accessibility: How easily accessible supplies are for each medium. Example, are specific tools required that are hard to find?

Fun to Use: How much enjoyment I got out of using this medium

     So, for pencil, my rating is: 18

Ease of use: 5
  For realsies, anyone can use a pencil. 

Affordability: 5
     So very affordable. Everyone has a pencil.

Accessibility: 5
     Pencils are probably the easiest of all art supplies to find. Except at my house, my house is like a giant black hole for pencils.

Fun to Use: 3
    I do not like to finish off a piece of art in pencil. I'm just not a fan of the whole thing. I don't know why. But, I will continue to sketch out just about everything I draw in pencil before moving on to a different medium.


     If you would like to go on this epic art adventure with me, next week we will be doing...


     If you choose to follow along, please post your work using #52weekartadventure!

Friday, October 18, 2019

52 Weeks of Art: Week 16

Week 16: Crayons


Welcome to week 16 of 52 weeks of art! What are we doing this week?


          This week I channeled my inner child. Crayons. Now, I could have been boring and just colored a picture with crayons. But, I really wanted to explore the creative ways you can use crayons. So, naturally, I headed to the internet to see what other people have done with crayons. I'm sure you've seen plenty of these:

Here's some instructions on how to make this.

     Just go to Google and search "crayon art" and you'll get a million pictures of art that looks very similar to the above picture. Well, I wanted something less crafty-ish. Not that these types of pictures are bad! No, I think some of them are quite beautiful and unique, I just didn't want to use crayons this way. 
     I talked to Rebecca, my partner is crime for this art adventure, and we decided on a way to use our crayons. Luckily, she has lots and lots of crayons. Would you believe I couldn't find any crayons anywhere in my house? Not. A. One.
      We decided to melt our crayons, but not like the above picture. No, we used an electric griddle (covered in foil so crayon wouldn't melt all over it) and put our paper on top. We drew on the paper with the crayons. As we drew, the hot (hot-ish, really) griddle melted the crayons. There was something very therapeutic about melting the crayons that way.
     We did have to babysit the griddle the whole time, though. It would start to cool down after a time and we'd have to turn it up again. It never really got hot enough to burn you, but it was uncomfortably warm. So much so that you couldn't rest your hand on the griddle.
     And here's some of what I created...

This is just fun melting crayons.

This is supposed to be some flowers. The Oldest says it looks like eyeballs floating in slime.

I don't know what this is.

Mountains, sky, and sea.


On to rating crayons...

     Just a reminder on the criteria for rating each medium.

Ease of use: How easy was this medium to use.

Affordability: How affordable supplies are for each medium.

Accessibility: How easily accessible supplies are for each medium. Example, are specific tools required that are hard to find?

Fun to Use: How much enjoyment I got out of using this medium

     So, for crayons, my rating is: 20

Ease of use: 5
   Crayons have got to be the easiest art supply to use. Seriously. But, if you're melting them, like I did, just be careful you do not burn yourself. Watch the little ones closely if you're doing it with children.

Affordability: 5
     Crayons are incredibly affordable. I will say, though, that I am kind of crayon snob. The Crayola crayons, in my opinion, are the best. They color the best. They melt the best. They are just overall the best crayon to use. Luckily, even Crayola crayons are still very affordable. AND, melting the crayons this way, on a griddle, doesn't use up much of the crayon.

Accessibility: 5
     Crayons are one of those things that are sold just about everywhere.

Fun to Use: 5
    I really enjoyed using the crayons this way. Melting them was really fun. Again, something very therapeutic about just melting a bunch of crayons. Fun. Fun. Fun.


     If you would like to go on this epic art adventure with me, next week we will be doing...


     If you choose to follow along, please post your work using #52weekartadventure!

Friday, October 11, 2019

52 Weeks of Art: Week 15

Week 15: Pastels


Welcome to week 15 of 52 weeks of art! What are we doing this week?


     Another week has gone by, that means another art medium to try. This week we used pastels. It's been ages since I used pastels. Last time I used pastels was in high school, so like 20 years ago. Now, if you're thinking that pastels are like chalk, you'd be wrong. Well, sort of. I mean, pastels do come in stick form and do kind of write like chalk. But pastels are not chalk. Chalk, according to the internet, is made out of limestone or gypsum and compressed into powdered sticks. Pastels are made from pure mineral pigments. So yeah, different, but similar. You wanna see some amazing pastel artwork? I thought so. Here you go:

Check out this beautiful painting here.
  
         
Here's an article about famous artists who also worked in pastels. Like this Degas. Beautiful.
     So, I pulled out my pastels and got to work. I have a set of pencil pastels and stick pastels. I used them on various different papers to see which papers I liked the best. Like always, I pulled out my cold press watercolor and hot press paper. I also pulled out some block printing paper and some black paper that is made for pastels. 

Here's my set of pencil pastels.

Here's my test paper using the pencils.
Here's my stick pastels.


Here's my test papers using my stick pastels.

     I didn't like how the pencil pastels looked. I thought that the stick pastels were much better, not as easy to use, but looked better. As far as paper goes, the cold press watercolor paper was the worst. I knew that it probably would be. It was just too rough. The block printing paper was a little better, but I couldn't get the pastels to blend easily. The hot press paper was actually pretty good, the pastels blended nicely. And, of course, the black pastel paper was very nice to work with. I wish I had it in a different color, maybe a soft gray. I did like how well the color "popped" on the black, though.

     Again, I am TERRIBLE at taking process photos! I am so sorry. I decided to try out two papers for my artwork this week. I used the black pastel paper and the hot press paper. Pastels are very messy, so I used some washi tape and taped the paper to a piece of cardboard I had laying around the house to make it easier. I also decided to make the same picture on both papers so see the difference.

Same picture, same pastels, different papers.

     I have to two papers side by side. I used the same pastels on each one. The one one the left is the black paper, and the one on the right is the hot press paper. You can see there is a huge difference between the two. It's not just in the color, but you can see that the pastels blended much better on the black paper than they did on the other paper. I guess what I'm trying to say here is, make sure you use the right paper for your project. Using the right paper will make a huge difference in the over all look of your completed artwork.

     Here's some close ups of the finished artwork.

Black pastel paper.

Hot press paper.


On to rating pastels...

     Just a reminder on the criteria for rating each medium.

Ease of use: How easy was this medium to use.

Affordability: How affordable supplies are for each medium.

Accessibility: How easily accessible supplies are for each medium. Example, are specific tools required that are hard to find?

Fun to Use: How much enjoyment I got out of using this medium

     So, for pastels, my rating is: 18

Ease of use: 4
   Pastels are mostly easy to use. It's trying to get them blended well that's difficult. I just used my fingers, but you can use whatever. They do make some fancy tools for blending, I just don't have any of those.

Affordability: 5
     If you're just looking to try out soft pastels, you can get a cheap set of them for around $6. If you're looking at going all out, getting the good stuff, you can look at spending $75+ for a professional set of pastels. You can use whatever paper you want to use, but I recommend you get pastel paper. You can get a pad of pastel paper for about $7. So, all in, on the cheap side, you're looking at spending under $15. I'd say that's pretty affordable for trying something out.

Accessibility: 5
     Any arts and crafts store should have some pastels. Also, Amazon sells everything.

Fun to Use: 4
     I am not really a big fan of pastels. They are messy. You get pastel dust all over the place. Your hands get messy. I don't know, I usually don't mind messy, but there's just something about pastels that I don't love. But hey, give it a try. You might fall in love with pastels. Who knows?


     If you would like to go on this epic art adventure with me, next week we will be doing...


     If you choose to follow along, please post your work using #52weekartadventure!

Friday, October 4, 2019

52 Weeks of Art: Week 14

Week 14: Marker


Welcome to week 14 of 52 weeks of art! What are we doing this week?


     Markers! What qualifies as a marker? There are so many different things out there, but I wasn't exactly sure what makes a marker. According to the dictionary, a marker is something that is used for marking. So yeah, that was super unhelpful. Does that make a pen a marker? What's the difference? I don't know! I couldn't really find any definite answers. It's even more confusing when something is labeled as a marker pen. If you look up "marker" in art supplies you'll get about a zillion results - there are so many types of markers!
  • alcohol ink
  • brush
  • paint
  • chalk
  • watercolor
  • dry erase
  • permanent
  • etc...
     That's just the TYPES of markers, then you have a million different brands of markers for each type. There's Crayola, Copic, Sharpie, Micron, Expo, etc. There is a huge price difference between all the markers as well. Copic markers, for example, are around $8 a piece. That's right, $8 for just ONE marker. You can get a set of 10 Crayola markers for less than $5. So yeah, big difference. Now, that's not saying that Copic markers and Crayola markers work the same - they are completely different markers. But, honestly, if you just want to try out coloring with markers, Crayola isn't bad. 

     You've selected your markers and are ready to go! Now you just gotta figure out what paper you want to use. I pulled out my collection of art markers and paper and tried them all out. I used some cold press watercolor paper, hot press paper, copy paper, and finger painting paper. 

Various art markers and papers.
     I found that I really liked using the finger painting paper. It is incredibly thin paper, but somehow doesn't bleed through. Amazing. Using the Copic markers on copy paper bled through three pages, but didn't go through the finger painting paper. Wow. I was impressed. Also, the shiny surface of the paper really allowed the ink to flow and do it's thing. The other papers just absorbed the ink. Is this the paper recommended by professional marker artists? I highly doubt it. But, I liked it.

     Before I show you what I ended up making, let's take a look at some real artists work.

I found this here. And so many more AMAZING pieces.


You can BUY this cute little guy here.

     Now that you know what real artists can do with markers, are you ready to see what I made?

Here it is! It's a fox.

     I'm pretty sure I didn't actually use the markers the way you're supposed to use markers. In fact, I don't know if I even know how to use markers the right way. I kept trying to use them like paint. They are not paint. Will I be using markers more in the future? I don't know. Maybe I will. I probably should, I've got some markers. I would hate for them to go to waste, why not use them? Here's a close up of my little fox.

foxy.


On to rating marker...

     Just a reminder on the criteria for rating each medium.

Ease of use: How easy was this medium to use.

Affordability: How affordable supplies are for each medium.

Accessibility: How easily accessible supplies are for each medium. Example, are specific tools required that are hard to find?

Fun to Use: How much enjoyment I got out of using this medium

     So, for marker, my rating is: 18

Ease of use: 5
   If you can use a pencil, you can use a marker. Markers are very easy use. My only problem with markers is the overlap you get with them, all the lines.

Affordability: 4
     I'm going to dock a point for this because if you want to get actual "art" markers, they are very pricey. But yeah, if you just wanna try out some markers, there are some much cheaper options. They are lesser quality, but you don't need high quality to just test out markers. Right? I don't know, I'm no marker expert.

Accessibility: 5
     Cheaper markers, like Crayola, are literally available in every store. At least, the stores I shop at. Okay, high end clothing stores aren't going to sell Crayolas, but you get what I mean.

Fun to Use: 4
     I was not a huge fan of markers. I don't think it's for me. Obviously there are people out there who LOVE using markers. I'm just not really one of those people.


     If you would like to go on this epic art adventure with me, next week we will be doing...


     If you choose to follow along, please post your work using #52weekartadventure!