Friday, August 30, 2019

52 Weeks of Art: Week 9

Week 9: Styrofoam Printing


Welcome to week 9 of 52 weeks of art! What are we doing this week?


      Styrofoam printing? What's that? It's a form of block printing. It's like using a rubber stamp but with styrofoam instead. You draw your design on the styrofoam, put some ink on it, stamp it onto some paper. Done! Alright, it's not QUITE that simple, but you get the idea.

    I've done print making before, but I've never used styrofoam. This was a new adventure for me. But, that's what this whole 52 weeks of art is all about, trying new things, expanding my artistic creativity. So, styrofoam printing, here I come!

     In case you did not know, not all styrofoam is created equal. You can get some cheap foam plates and use those, but they are thin, flimsy, and overall just not great. You're gonna want to go with something a little sturdier. Foam trays that meat comes on work great. Now, you don't have to recycle your meat trays - although you could, that's a great way to help out the environment if you're in to that sort of thing. You can buy new trays. Just make sure you cut off the sides so you have a nice, flat surface to work with. If you don't have a flat surface your print won't turn out great.

      Alright, now that you've selected your styrofoam of choice, on to your design. Keep in mind that whatever design you choose will be printed in reverse. So, if you're doing text make sure you trace it in reverse onto your foam. Unless you want to read backwards. It's your art, I'm not gonna tell you how to make it.

     I went with two different designs. First thing, measure out your paper, your design obviously has to fit onto your piece of styrofoam.

Measured my paper to fit my foam.
     My first design is this fish I drew. His name is Flynnigan. We're pals now.


Clean up your design, clean lines only.

     My second design was this little foxy guy. He's kinda cute, I guess I'll keep him.


My foxy friend has thicker lines than Flynnigan.

     Next step, transfer your design onto your piece of foam. Here I have some transfer paper I was planning on using. FYI, transfer paper does NOT work on foam.


Getting ready to transfer Flynnigan onto foam. 

     I taped Flynnigan onto my foam, I didn't want him moving around while I was trying to trace him. For this part you can use a ballpoint pen, I recommend using a different color. That way you can see where you've already traced. I used a mechanical pencil. I was trying to get some very fine lines that I wouldn't have been able to get with a ballpoint pen.


Flynnigan getting ready to be traced.

When I found out that my transfer paper did NOT work on the foam I had to trace Flynnigan again. I used more pressure this time and hoped for the best - no mistakes this time around. I used some charcoal powder and rubbed it over Flynnigan so I could see him better. I wanted to make sure I got all my lines.


Flynnigan after his charcoal rubdown.


    Time to ink him up. Flynnigan's a goldfish, so I used gold ink. Obvs. Make sure you cover your work surface so you don't get ink all over the place. I used some flyers I got in the mail. Nothing better than free, right? Thank you, Rebecca Johnson, for the brayer and glass. What's a brayer? It's that roller thing you see in the picture below. It's like a fancy paint roller for print making.

Gold water based Speedball ink, speedball brayer, piece of glass.

     And here we have Flynnigan's transformation from drawing, to foam, to final print! Yeah, I know, this isn't the best photo. Sorry, Flynn, you're a little blurry here. I used paper that is made just for printing.


The many faces of Flynnigan G. Fish

     Did you forget about my foxy friend? Well, he got black ink.


Black water based speedball ink, speedball brayer, piece of glass.

     Here's my fox is all his glory. Going from simple line drawing, to foam, to final print.


The three steps of foam printing.

     Now, when you're doing print making, keep in mind that the first print is probably not going to turn out great. You have to try it again, make sure you get a good, even coverage of ink all over. Below, you'll see Flynnigan printed twice. The top print is a second run, the bottom print is the first printing. You can see much more detail in Flynnigan the Second.


Flynnigan the Second, Flynnigan the Original.

     Here's some close up photos of both prints.


Flynnigan the Original

Flynnigan the Second

     Here's Foxy. Here's his first run, second run, and then printed on some colored pastel paper.


Fox run one

Fox run two

Fox on pastel paper

     Well, what'd you think of Flynnigan and Fox? Are you a fan?

     
On to rating styrofoam printing...

     Just a reminder on the criteria for rating each medium.

Ease of use: How easy was this medium to use.

Affordability: How affordable supplies are for each medium.

Accessibility: How easily accessible supplies are for each medium. Example, are specific tools required that are hard to find?

Fun to Use: How much enjoyment I got out of using this medium

     So, for styrofoam printing, my rating is: 17

Ease of use: 5
    If you can use a pen/pencil then you can do this. Easy peasy. Just keep in mind that ANY mark you make on the foam will end up a part of your print. And it's pretty easy to mark up styrofoam.

Affordability: 3
     The styrofoam is pretty cheap. It's the ink, brayer, and paper that'll cost you. Now, @RollingMeadowsArt used markers instead of printing ink. That will save you cost on actual print making ink. So, if you just want to dip your toe into the print making waters, using foam and markers is a good choice.

Accessibility: 4
     Foam plates are available just about anywhere. Markers are also available everywhere. If you want to use print making inks you'll have to go to an art store and turn to the internet. I LOVE the internet. Amazon is the best.

Fun to Use: 5
     This was fun. It was easy to do. Quick. Seeing Fynnigan in his final form was exciting.

     If you would like to go on this epic art adventure with me, next week we will be doing...


     If you choose to follow along, please post your work using #52weekartadventure!

Friday, August 23, 2019

52 Weeks of Art: Week 8

Week 8: Spray Paint


Welcome to week 8 of 52 weeks of art! What are we doing this week?


     I don't know what I was thinking when I added spray paint to the list of mediums to do. I watched so many videos of people creating amazing pieces of art with spray paint and I was like, "What?! I can't do this!" Seriously. They all make it look so easy. And amazing.

It's like magic! How do they do this?

For reals? How?

A-maze-ing!

     So, watching all these videos did NOT help my confidence that I could pull this off. But, I was going to try it anyway. A lot of the artists used stencils. So, I thought I'd make my own stencils. Of what, though? Now, I'm no expert here - not even close - but it looked like doing some sky/space/cloud painting would be the easiest. I made myself a cloud stencil.


Those are clouds. 
     I thought I made my cloud stencil small enough. Turns out I did not. I'll show you later how not small my clouds are. Other than a stencil, I needed the most important part of spray painting. I needed spray paint! Instead of buying a bunch of paint, I just raided our garage for whatever my husband had. Apparently we own a LOT of spray paint. Here is just a small sampling of what we have. I pulled out some of the colors I thought we might use. I used mostly cool colors. Rebecca used all the colors.


Thanks to my husband we had lots of spray paint to choose from!

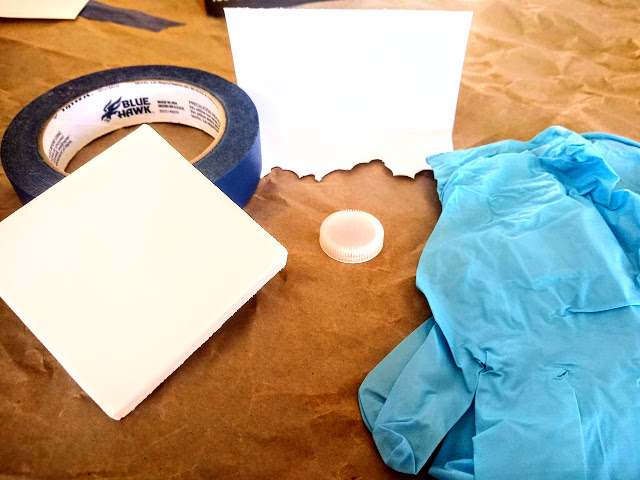
     Other supplies I needed included paper for the table I was using, tape, canvas, gloves, and a bottle cap. This is probably common sense stuff here, but you're going to want to spray paint outside. Not just because of the fumes, but you probably don't want over spray all over your house. Well, I didn't. Maybe you do. Who am I to judge?


     During my research into spray paint art I looked up the best paper to paint on. Do you know what they use? It's poster board. I never would have guessed that. Then again, I'm not a spray paint artist. You use the glossy side of the paper. Unfortunately, I didn't have any poster board. I did have some mini canvases, though. I gessoed them so the canvas wouldn't soak up the paint. My research suggested that I sand down the gesso... I did not. I was lazy. 

     How'd the spray paint art turn out? Take a look. I made a trio of paintings. The first one I tried was a space painting with a moon and some "clouds". This is where my not-small-enough cloud stencil didn't work out so great. I used the bottle cap to help me create the moon. I'm calling it a moon. It might not really look like it, but hey, it is what it is.


Moon, space, clouds

     It was like a billion degrees outside while we were painting. Alright, it was more like a hundred degrees. My point is, it was hot. SO hot. I left my paintings outside so they could bake in the sun. Here they are "baking".


Here's my trio of paintings. I just made some "space" for the other two paintings. Here they are drying.

     I really liked how my paper looked when I was finished with my painting.


I think there is more paint on the paper than there is on the canvas.
    After my paintings were dry I got some pictures. Because I didn't sand down the gesso you can really see the texture of the canvas. It's not as glossy and smooth as spray paint artists get. 


     Will I be doing spray paint art in the future? I don't know. It was fun, but it definitely will take practice if  I want to be any good at it. 


On to rating spray paint...

     Just a reminder on the criteria for rating each medium.

Ease of use: How easy was this medium to use.

Affordability: How affordable supplies are for each medium.

Accessibility: How easily accessible supplies are for each medium. Example, are specific tools required that are hard to find?

Fun to Use: How much enjoyment I got out of using this medium

     So, for spray paint, my rating is: 14

Ease of use: 3
    Not easy. At all. It was easy to accidentally spray over everything I just painted, though. Maybe if I was painting a larger surface it would have been easier, but painting a 3" x 3" canvas was difficult for me.

Affordability: 2
     I'll be honest here, I don't even know what type of spray paint is the best to use for art. I do know that you can get a can of paint at Home Depot for around $5. That's just for one color. If you're needing to use a lot of colors it'll add up quickly. I used 8 colors. If we didn't already have the paint, that would have cost me at least $40. So yeah, I'm going to say that spray paint isn't something that you can get in to on a budget. 

Accessibility: 5
     Luckily, if you do decide to try your hand at spray paint art, spray paint is available at any hardware store, the internet, and possibly at an arts and crafts store.

Fun to Use: 4
     I enjoyed spray painting. It did cause me some frustrations when I couldn't get things the way I wanted. Sometimes I would accidentally spray over the whole painting and I'd have to start over. But, I'd say that overall spray painting was a fun medium to use.

     If you would like to go on this epic art adventure with me, next week we will be doing...


     If you choose to follow along, please post your work using #52weekartadventure!

Friday, August 16, 2019

52 Weeks of Art: Week 7

Week 7: Cross Stitch


Welcome to week 7 of 52 weeks of art! What are we doing this week?


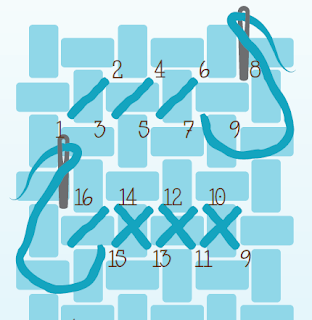
     I have been looking forward to doing cross stitch! It's sort of my thing. If you're not familiar with cross stitch, let me explain what it is. It's a series of  X's stitched onto fabric. Confused? Let me show you some photos.


     Cross stitch is typically done on Aida fabric. The fabric has a grid on it that makes it super easy to stitch little X's all over it. But you can cross stitch on just about anything, it doesn't have to been done on Aida fabric.

Check out this amazing cross stitch done on a wooden bag! I love it!

I found this amazing piece here.

I'm in love with this chair! I want one.

I found this chair and other unique cross stitch projects here.

Alright, so these are tattoos, but they are done to look like cross stitch. Pretty amazing.

I found these and others here.

     For my cross stitch project this week I wanted to do something a little extra. We're doing tiny art, so this needed to be small. So, instead of using the standard 14 count Aida fabric, I went with 20 count. What does that mean? Well, let's take a look at this photo below. Here we have Clyde stitched up on three different sizes of Aida. Far left is 6 count, middle is 14 count, and right is 20 count. You can see that the larger the count, the smaller the design. So, tiny art project = 20 count Aida. 

You can read more about Aida sizes here.

     Here's the beginning of my tiny cross stitch project! First thing I needed to do was stitch in some guide lines. I am so glad that I did that, I couldn't have finished this project without these guide lines. Well, I probably could have finished, but it would have been extremely difficult.


     Then, I gathered up all my stitching supplies and got to work... There's a lot of photos, I know.

Cut out my piece of fabric.

Stitching up my guide lines

Close up of my pattern.

And so it begins...

This is going to take a while.

Have I even done anything?

Several hours later...

Days of work here.

It looks the same!

This is my life now.

I can't even tell I've been working on this for the past 6 hours!

This is never going to end!

What was I thinking?

Sooo close to being done!

Almost there!

The final few stitches!

55 hours of work later.

Here's the backside. The Oldest thinks it looks more like the painting than the front does.

My father-in-law made this frame for me. This one turned out too big, so he made me another one.
I didn't get a picture of that one.

My father-in-law is amazing! This frame fits PERFECTLY!

And DONE!!!


     I had a real love/hate relationship with this project. I know you can't really tell from the photos, but this turned out to be just under 3" wide. So yeah, it's tiny. I really loved how it turned out, but I struggled with getting it done in a week. I don't know what I was thinking. Anyone who tells you that tiny art is easier/quicker because it's tiny is lying to you. Tiny does not equal quick and easy. Not. At. All. I look at the finished piece and I think, "wow. I did that."


Here's a picture of my holding it, just so you can see how tiny it really is. 

So tiny!

Would you like to stitch up your very own Tiny Starry Night? Here's the pattern!


On to rating cross stitch...

     Just a reminder on the criteria for rating each medium.

Ease of use: How easy was this medium to use.

Affordability: How affordable supplies are for each medium.

Accessibility: How easily accessible supplies are for each medium. Example, are specific tools required that are hard to find?

Fun to Use: How much enjoyment I got out of using this medium

     So, for cross stitch, my rating is: 18

Ease of use: 5
    Easy to use, even a beginner can do it! Especially if you stitch on the 6 count Aida. It just takes time. But who doesn't like stabbing something a thousand times? 

Affordability: 3
     Embroidery floss is not expensive. However, when you need to use MANY different colors, that's when it starts to add up. Each skein of floss costs $0.60 - $0.80, depending on where you get it from. Good thing though, one skein makes a lot of little X's. Aida fabric is also very affordable.

Accessibility: 5
     You can get embroidery floss and Aida fabric at any arts and crafts store. There are also several online stores where you can buy supplies. I like to buy my floss online because I get distracted by all the pretty colors and want to buy some of everything.

Fun to Use: 5
     I love to cross stitch. It's one of my favorite things to do. I love that stitching up a bunch of little X's turns into a picture. It's amazing. Also, it's nice stress relief - you know, all the stabbing really helps.

     If you would like to go on this epic art adventure with me, next week we will be doing...


     If you choose to follow along, please post your work using #52weekartadventure!